


The Right Way to Clean a Wooden Cutting Board (Without Wrecking It)
Your wooden cutting board sees more action than almost any other tool in your kitchen. It handles raw chicken, garlic cloves, crusty sourdough, and everything in between. But here’s the thing most people get wrong: wooden cutting boards do not clean the same way plastic ones do. Toss yours in the dishwasher once and you’ll understand exactly what I mean when you watch it warp and crack in real time.
The good news is that learning how to clean a wooden cutting board is genuinely simple once you know the rules. We’re talking about a 2-minute routine after each use and a deeper clean every week or two. Get this right and your board will stay food-safe, odor-free, and looking beautiful for years. According to the USDA FSIS, proper cutting board hygiene is one of the most effective ways to reduce cross-contamination in the home kitchen.
Whether you’re dealing with lingering onion smell, stubborn stains, or a board that needs a full refresh, this guide walks you through every method, every product, and every mistake worth avoiding. Consider it your complete reference for wooden cutting board care.
Quick summary: Rinse immediately after use, hand-wash with mild dish soap and warm water, dry standing upright, and oil monthly with food-grade mineral oil. Never soak, never dishwasher, never bleach undiluted. That’s the short version. Keep reading for the full treatment.
Table of Contents
Why Wood Needs Special Cleaning
Wood is porous. That’s both its greatest feature and its biggest challenge when it comes to hygiene. Moisture, bacteria, and food particles can work their way into the grain if you’re not careful. But here’s a fact that surprises most people: research from UC Davis found that bacteria drawn into the wood grain of a wooden board actually die off more readily than those on plastic surfaces, where knife scars harbor bacteria that survive scrubbing. Wood has a natural antimicrobial advantage, but it still needs proper care to stay that way.
The key is keeping moisture exposure short and controlled. A quick wash and thorough dry is your best defense. When wood stays wet for extended periods, it warps, cracks, and develops mold. Think of water as a temporary cleaning tool, not something your board should marinate in.
Different wood species also behave differently. If you’re working with a maple board, you’ll want to check out our deeper guide on how to care for a maple wood cutting board, since maple has specific oiling needs. For a broad comparison of wood types, our guide to choosing the best wood cutting board covers which species are most forgiving.
The Daily Cleaning Routine (After Every Use)
Consistency beats intensity every time. A 90-second wash right after you’re done cooking beats a 10-minute scrub session three days later when the garlic has fully committed to your board’s grain. Here’s the routine that works:
- Scrape off food debris immediately using the back of your knife or a bench scraper. Don’t let it sit.
- Rinse with warm water and a small drop of mild dish soap. Yes, soap is fine on wood. The “never use soap” myth is just that, a myth. What you want to avoid is soaking.
- Scrub with a soft brush or non-abrasive sponge. Go with the grain where possible.
- Rinse quickly and shake off excess water.
- Dry standing upright or propped so air can circulate around both sides. Laying it flat traps moisture underneath and warps the board unevenly.
That’s it. The whole thing takes less time than reading this paragraph. The drying step is where most people cut corners, and it’s the most important one. A board that dries flat, on one side, is a board that warps. Stand it up, lean it against the backsplash, let it breathe.
If you use your board for raw meat, add one extra step: after washing, spray or wipe with a diluted white vinegar solution (1 part vinegar, 4 parts water) and let it sit for two minutes before rinsing. Before you reach for that bottle, though, our article on whether vinegar is safe to use on wood is worth a quick read since concentration and contact time matter.
Pro tip: Keep two boards: one dedicated to raw proteins, one for produce and bread. This one habit eliminates most cross-contamination risk without any extra cleaning complexity. Color-coded boards make it foolproof.
Deep Cleaning Methods for Odors and Stains
Every wooden board picks up battle scars over time: garlic and onion smells that linger past their welcome, turmeric stains that refuse to budge, and discoloration from berries or beets. These are fixable without harsh chemicals. You probably have everything you need in your kitchen right now.
Salt and Lemon Scrub
This is the classic for a reason. Sprinkle coarse kosher salt generously over the board surface. Cut a lemon in half and use it as your scrubbing tool, cut-side down, working the salt into the wood in circular motions. The salt acts as an abrasive, the lemon juice as a mild acid that breaks down odors and stains. Let it sit for 5 minutes, then rinse and dry thoroughly. This works remarkably well on garlic, fish, and onion odors. You can even pick up a food grade mineral oil for cutting board under $10 to follow up with conditioning right after.
Baking Soda Paste for Stubborn Stains
Mix baking soda with just enough water to form a thick paste. Apply it directly to the stained area and let it sit for 5 to 10 minutes. Scrub with a soft brush, rinse, and dry. Baking soda is alkaline, which makes it effective at breaking down acidic food stains like berries and wine. It’s also completely food-safe, which matters since wood absorbs everything it touches.
Hydrogen Peroxide for Discoloration
A 3% hydrogen peroxide solution (the standard drugstore variety) can be applied with a clean cloth to discolored areas. Leave it for 10 minutes, then wipe clean and dry the board completely. Don’t use this regularly, monthly at most, as it can dry out the wood over time if overused.
Maintaining wooden kitchen tools in general follows a similar logic. If you’re also wondering how to keep your wooden spoons in top shape, our guide on 7 brilliant ways to clean your wooden kitchen spoons uses many of the same methods.
How to Sanitize a Wooden Cutting Board
Cleaning removes visible food and debris. Sanitizing reduces harmful bacteria to safe levels. Both steps matter, especially after cutting raw poultry, meat, or fish. The good news: you don’t need industrial-grade products.
White vinegar method: Pour undiluted white vinegar over the cleaned board surface and let it sit for 2 minutes. Wipe off and rinse. Acetic acid is an effective antimicrobial agent at full concentration. This is the gentlest option and won’t dry out your board.


Amazon Saver, Distilled White Vinegar, Great for Cooking and Cleaning,…
Currently unavailable.
Buy on Amazon

Amazon Saver, Distilled White Vinegar, Great for Cooking and Cleaning,…
Currently unavailable.
Buy on Amazon

Diluted bleach method: The USDA recommends a solution of 1 tablespoon of unscented liquid chlorine bleach per gallon of water. Apply, let sit for a few minutes, rinse thoroughly, and air dry. This is the nuclear option, effective and appropriate after handling raw chicken, but use it sparingly since repeated bleach exposure will eventually dry out and degrade the wood.
Hydrogen peroxide: As noted above, a 3% solution left for 10 minutes provides solid sanitizing action without the drying effects of bleach.
For a complete breakdown of sanitizing techniques and food safety specifics, our detailed guide on how to sanitize a wooden cutting board goes much deeper on the microbiology involved. It’s worth bookmarking if you handle raw proteins regularly.
Food safety reminder: Always sanitize after cutting raw meat, poultry, or fish, even if the board looks clean. Bacteria are invisible. The USDA’s cutting board safety guidelines recommend sanitizing as a separate step from washing for high-risk foods.
Oiling and Conditioning: The Step Most People Skip
Here’s where most wooden cutting board owners go wrong. They clean religiously and oil never, or maybe once when they first buy the board. Wood is a living material that needs moisture replenishment, especially if it gets washed frequently. An un-oiled board absorbs water unevenly, leading to warping, cracking, and eventually splitting. Oiling creates a barrier that helps water bead and run off rather than penetrate.
The only oil you should use on a cutting board that contacts food is food-grade mineral oil. It’s odorless, tasteless, won’t go rancid, and is classified as GRAS (Generally Recognized as Safe) by the FDA when used in food applications. Avoid vegetable oils, olive oil, coconut oil, or any cooking oil: they all go rancid inside the wood grain and create a smell no amount of lemon scrubbing will fix.
How to Oil Your Cutting Board
- Start with a clean, fully dry board. Applying oil to a damp board traps moisture inside.
- Apply a generous amount of food-grade mineral oil using a clean cloth or paper towel.
- Rub it in with the grain, covering all surfaces including the sides and bottom.
- Let the board absorb the oil for at least 2 hours, ideally overnight.
- Wipe off any excess with a dry cloth.
- Repeat this process 3-4 times for a new board. After that, once a month is usually sufficient.
A simple test to know when your board needs oiling: sprinkle a few drops of water on the surface. If they bead up and roll off, you’re good. If they absorb quickly and darken the wood, it’s time to oil. This is the same principle that guides care for any wooden surface, including our tips on maintaining your wooden dining table.
Food Grade Mineral Oil for Cutting Boards
The only oil you should ever use on a food-contact cutting board
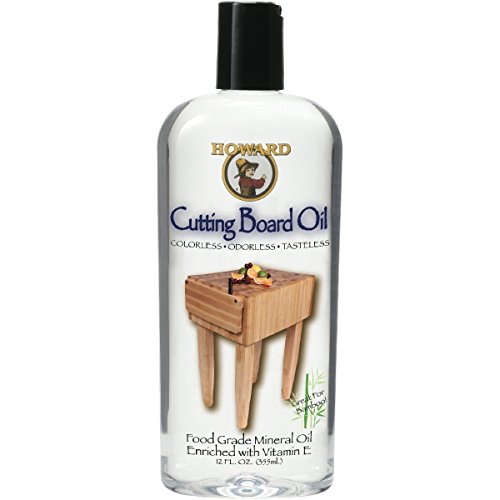


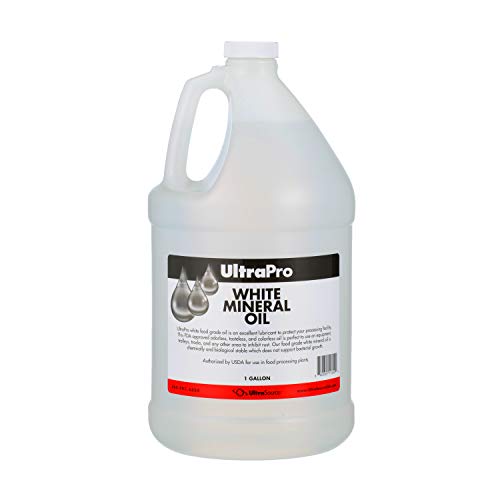

Premium 100% Pure Food Grade Mineral Oil USP, 4 Pack…
$111.99
Only 16 left in stock - order soon.
Buy on Amazon
What to Avoid (Seriously)
Some of the most common cutting board mistakes are completely avoidable. These are the ones that cause irreversible damage:
The Dishwasher
This is the biggest one. The combination of high heat, prolonged water exposure, and harsh detergent in a dishwasher will warp, crack, and split a wooden cutting board in a single cycle. It’s not a matter of if, it’s when. If your board has gone through the dishwasher and survived, it got lucky. Don’t press that luck again.
Soaking in Water
Letting a wooden board sit in a sink full of water, even for 20 minutes, is enough to cause uneven swelling. One side absorbs more than the other, and you end up with a board that rocks every time you use it. Always wash quickly and dry immediately.
Undiluted Bleach and Harsh Chemical Cleaners
Concentrated bleach breaks down the wood fibers over time and strips out the natural oils that keep the board flexible and crack-resistant. If you use bleach to sanitize, always dilute it (1 tablespoon per gallon of water) and limit it to high-risk situations. The same goes for harsh multi-surface cleaners: they’re not designed for wood and many leave residues you don’t want near your food.
Leaving It Flat While Wet
We mentioned this in the daily routine section, but it bears repeating. A wet board laying flat on a counter dries unevenly because the top surface dries faster than the underside. That differential causes warping. Stand it up or prop it against something every single time.
If you’re curious about how wooden cutting boards compare to alternatives on durability and hygiene, our article on wooden vs. plastic cutting boards breaks down the honest pros and cons of each. And if you’re wondering about using your board near heat sources, check out whether wood cutting boards are heat resistant before you place yours next to the stove.
Picking up a quality board doesn’t have to break the bank. You can find a solid wooden cutting board under $20 that will last for years with the right care routine.
Our Top Picks for Wooden Cutting Boards
These boards are built to last, and with the right care routine from this guide, they’ll outlast the kitchen itself

ODIFORGOO Teak Wood Cutting Board Set, Non-Toxic Kitchen Chopping Board…
$48.99
In Stock
Buy on Amazon

Kikcoin Non-Toxic Teak Wood Cutting Board Set, 2-in-1 Charcuterie Boards…
$49.99
In Stock
Buy on Amazon



The Bottom Line on Board Hygiene
A wooden cutting board is not high maintenance. It’s just different maintenance. Once you internalize the basic rules, none of this takes more than a couple of minutes a day. Wash with warm soapy water, dry standing up, deep clean with salt and lemon when needed, sanitize after raw proteins, and oil once a month. That’s the whole system.
The payoff is real. A well-maintained wooden board is genuinely safer and more hygienic than a scratched-up plastic one. It also looks better, feels better under your knife, and tends to last for decades rather than years. The best wooden cutting boards become heirlooms, objects passed down in families because someone took 90 seconds after dinner to rinse and dry them properly.
If you’re just getting started with wooden kitchen tools, our post on the amazing benefits of wooden kitchen utensils makes a strong case for why wood belongs in every kitchen. And once your board is clean and conditioned, our cutting board maintenance complete guide covers every other aspect of long-term care, from sanding out deep scratches to reviving a dried-out board that has been neglected.
This article contains affiliate links #ad
Can you use dish soap to clean a wooden cutting board?
Yes, you can and should use a small amount of mild dish soap. The old advice to never use soap on wood is outdated. The key is to avoid soaking: wash quickly with warm soapy water, rinse, and dry immediately. Brief soap exposure will not damage a properly oiled board.
How do you get the smell out of a wooden cutting board?
The salt and lemon scrub is the most effective method for odor removal. Sprinkle coarse salt on the board, rub with a halved lemon cut-side down, let it sit for 5 minutes, then rinse and dry thoroughly. For persistent odors like fish or garlic, follow up with a wipe of undiluted white vinegar before rinsing.
How often should you oil a wooden cutting board?
Oil a new board 3 to 4 times in the first few weeks to build up the protective layer. After that, once a month is usually enough for a board in regular use. A quick test: sprinkle water on the surface. If it beads up, you are good. If it absorbs quickly and darkens the wood, it is time to oil.
Is it safe to cut raw meat on a wooden cutting board?
Yes, with the right precautions. Use a dedicated board for raw proteins and sanitize it after every use. Research from UC Davis found that bacteria drawn into wood grain die off more readily than bacteria in plastic board scars. The sanitizing step (diluted bleach or white vinegar) is still important after cutting poultry, meat, or fish.
How do you know when a wooden cutting board needs to be replaced?
Deep cracks or splits that cannot be sanded out, persistent mold that returns after cleaning and sanitizing, or a board that has warped so badly it rocks are signs it is time for a replacement. Surface knife marks are normal and can be fixed by lightly sanding with fine-grit sandpaper followed by a thorough re-oiling session.




Loved by our customers


Wooden Utensil Holder

Wood Cutting Boards
Walnut Wooden French Bread Slicer for Baguettes, 1 inch thick slices
Living Room