


How to Clean a Wooden Grinder Without Ruining It

Your wooden grinder is one of the hardest-working tools in the kitchen. Every twist of the mill releases freshly cracked pepper, coarse sea salt, or whole spices — and most of that flavor lives in the burr mechanism. The problem? Wooden grinders are not dishwasher-safe. They are not even sink-safe. The moment you submerge a wooden pepper mill in water, you invite warping, cracking, and a mildew smell that lingers long after the wood dries out.
So how do you actually clean a wooden grinder without destroying it? The answer is a dry-first, brush-forward routine paired with occasional food-safe mineral oil conditioning. Whether you are dealing with a classic wooden pepper grinder, a large salt mill, or a handheld spice grinder, the principles stay the same. You work with the grain, keep moisture to a bare minimum, and give the wood a protective finish that keeps it performing season after season.
This guide covers the full process — from weekly shake-outs and brush cleaning to deep disassembly, odor removal, and wood conditioning. If you have ever wondered why your grinder started clumping, seizing, or smelling faintly of old spice cabinet, you are about to find out exactly how to fix it.
Pro tip: Never rinse a wooden grinder under the faucet. Even a brief soak can cause the wood to swell, the glue joints to loosen, and the burr mechanism to rust. Dry cleaning methods do the job just as well — without the damage.
Table of Contents
Why You Cannot Submerge a Wooden Grinder
Wood and water have a complicated relationship. Expose wood to sustained moisture and it absorbs it — expanding, warping, and eventually cracking as it dries unevenly. For a kitchen tool with tight tolerances like a grinder, even minor swelling can bind the mechanism and make the mill nearly impossible to turn. The internal ceramic or steel burr also corrodes with prolonged moisture exposure, dulling the grind quality over time.
Salt mills face an added challenge. Salt is hygroscopic, meaning it pulls moisture from the air and from whatever it contacts. When salt crystals dissolve slightly on a wet wooden surface, they recrystallize as the moisture evaporates — leaving a fine abrasive residue inside the shaft and burr seat. Over months of use, this buildup causes clumping, salt bridging, and a grinding action that gets progressively worse.
Spice grinders have their own quirks. Aromatic resins from whole cumin, coriander, or cardamom cling to the wooden interior long after you empty the chamber. Heat and humidity cause those oils to go rancid, creating the stale, musty smell many people notice when they crack open a grinder that has not been cleaned in months. The solution is the same across all three grinder types: dry mechanical cleaning, occasional damp-wipe with minimal moisture, and periodic wood conditioning. For more on why wood and water do not mix in kitchen tools, see our guide on whether vinegar is safe to use on wood — the same principles that apply to cutting boards apply here.
What You Need Before You Start
You do not need a specialty cleaning kit to maintain a wooden grinder. Most of what you need is already in your kitchen or hardware drawer. The key is having the right brush sizes for the different chambers and shafts, plus a food-safe oil for the conditioning step.
- Stiff-bristle cleaning brush — an old toothbrush or a dedicated bottle brush works well for the interior chamber
- Soft natural-bristle brush — for the exterior wood surfaces to avoid scratching the finish
- Dry microfiber cloth — for wiping down exterior surfaces and removing loose debris
- Compressed air or small bulb syringe — useful for blasting residue out of the burr mechanism without disassembling
- Food-safe mineral oil — for conditioning the wood body after cleaning
- Small screwdriver or coin — some grinder shafts are secured by a flathead screw or acorn nut at the top
- Bowl or tray — to collect the old spice, salt, or pepper that falls out during cleaning
One thing to leave out: dish soap. Even a tiny amount of soapy water drawn into the grain will strip the natural oils from the wood and hasten cracking. If you absolutely must use a liquid agent to address a sticky resin residue, a single drop of white vinegar on a cotton swab used very sparingly — with immediate drying — is the outer limit of what is safe. The same logic applies to caring for a maple wood cutting board: keep liquids minimal and dry quickly.
How to Clean a Wooden Grinder Step by Step
This routine works for a standard wooden pepper mill, salt grinder, or spice grinder. Follow the steps in order — disassembly first, then brush cleaning, then any damp treatment, then drying, then reassembly.
Step 1: Empty and Disassemble the Grinder
Tip the grinder upside down over a bowl and twist the grinding knob to its most open setting. Give it a few firm taps on the counter to dislodge the remaining spice, salt, or peppercorn fill. Most wooden grinders disassemble simply: unscrew the top knob or acorn nut, lift off the top cap, and slide the internal shaft mechanism straight out of the body. Set each piece aside on a dry cloth so you can track the order of reassembly.
If the grinder has a twist-off base instead of a top mechanism, rotate counterclockwise until the base separates from the main body. Some mills have a locking collar near the grinding head — consult the brand instructions if you are unsure. The goal is to expose both the burr grinding head and the interior of the wooden chamber for cleaning.
Step 2: Dry-Brush the Burr Mechanism
The burr — whether ceramic, carbon steel, or stainless — is where most of the caked residue lives. Use a stiff-bristle toothbrush to scrub between the grinding teeth in a circular motion. Work over your bowl so you can see what is coming loose. For a pepper mill, you will often dislodge oils and fine black dust. For a salt grinder, small damp clumps of recrystallized salt will fall out. For a spice grinder, expect sticky resinous residue that may require more passes with the brush.
If you have compressed air, a short burst directed into the burr housing clears the fine dust that a brush cannot reach. Hold the mechanism over a trash can and use short controlled bursts — you do not want to drive debris deeper into the wood grain. A bulb syringe is a gentler alternative that gives you more control over airflow direction.
Step 3: Clean the Wooden Chamber Interior
With the shaft mechanism removed, you now have a clear view of the wooden interior. Use a dry brush to scrub the inside walls in a circular motion, working from top to bottom. Pay extra attention to the area just above the grinding head opening where oil-soaked residue tends to accumulate. Tap the grinder body lightly on your palm to dislodge loosened particles and pour them out.
Pro tip: For spice grinders with lingering odors, place a small amount of dry white rice in the cleaned chamber and grind it through. The rice acts as a mild abrasive that scrubs residual oils from the burr while also absorbing leftover aroma compounds. Empty and discard the rice before refilling with fresh spice.
Step 4: Wipe the Exterior
The outside of the grinder handles cooking grease, finger oils, and the occasional spice splash. Use a dry microfiber cloth first to remove loose dust and surface debris. If there are sticky spots from cooking oil or sauce splatter, dampen a corner of the cloth with plain water — just barely damp — and wipe the affected area. Follow immediately with a dry section of the cloth to pull the moisture back out before it has a chance to penetrate the grain.
Do not use paper towels on a finished wooden grinder. Paper towel fibers are mildly abrasive and can dull a lacquered or oiled finish over time. A soft lint-free cloth is the right tool here. If you want a broader overview of routine wood care, our piece on maintaining wooden dining table surfaces covers the same gentle mindset well.
Step 5: Allow to Air Dry Fully Before Reassembly
Even if you used only a barely damp cloth, give the grinder at least 20 to 30 minutes to air dry fully before putting it back together. Stand the body and shaft separately upright on a clean cloth in a well-ventilated spot, away from direct sunlight or a heat vent. Do not speed-dry with a hair dryer — rapid localized heat causes wood fibers to contract unevenly and can crack finished surfaces.
Deep Cleaning a Seized or Smelly Grinder
Sometimes a regular brush-out is not enough. A grinder that has gone months without cleaning can seize up, grind unevenly, or carry a rancid odor that no amount of brushing removes. These situations call for a more targeted approach — still no soaking, but a few additional techniques that address the root cause.
For a Seized Mechanism
A seized grinder is usually caused by one of three things: recrystallized salt bridging the burr, dried resin from aromatic spices, or wood swelling that has tightened the shaft tolerance. Disassemble the grinder fully and soak just the metal burr mechanism in white vinegar for 10 minutes if salt is the culprit — keep the wooden body well clear. For resin buildup, a cotton swab dipped lightly in rubbing alcohol and run through the burr teeth can dissolve the sticky residue. Always dry the metal parts thoroughly before reassembly.
If wood swelling is the issue, the fix takes more patience. Let the grinder dry completely in a climate-controlled room for 48 hours before reassembling. If the shaft still binds after drying, a single pass of food-safe mineral oil along the wooden shaft surfaces can reduce friction. This is one of the reasons sanitizing wooden kitchen items with dry methods is always recommended over wet approaches — once moisture gets into the grain, you are managing consequences rather than preventing them.
For Persistent Odors
Rancid oils embedded in the wood grain are the hardest odors to remove. The rice-grinding trick from Step 3 is your first line. If odor persists after two rice passes, try a dry baking soda treatment: fill the empty chamber loosely with baking soda, cap it, and leave it overnight. The baking soda absorbs volatile odor compounds from the surrounding wood. Tap it out the next morning, brush the interior clean, and allow several hours of airflow before refilling.
Pro tip: If you are switching a wooden spice grinder from one strong spice to another — say, from cloves to coriander — do a rice grind and baking soda overnight treatment between fills. The residual aromatic oils will otherwise flavor your new spice from day one.
How to Clean Different Types of Wooden Grinders
While the core method stays consistent, each grinder type has quirks worth knowing. Tailoring your approach to the specific fill you are grinding will save you time and protect the burr longer.
Wooden Pepper Grinders
Pepper mills are the most forgiving to clean. Black pepper is relatively dry, and the oils it releases are mild enough that they do not usually cause sticky buildup. A monthly dry-brush routine is usually sufficient for a daily-use pepper mill. The main thing to watch for is fine black dust accumulating in the shaft groove, which can cause the grinding head to wobble slightly off-center over time. A pipe cleaner or thin brush pulled through the shaft groove clears this in seconds.
Wooden Salt Grinders and Salt Mills
Salt grinders need the most attention because of salt’s hygroscopic properties. If you live in a humid climate, salt can bridge and clump inside the chamber even between uses. Clean your wooden salt grinder every two to three weeks in humid weather, or whenever you notice the grinding action getting stiff. After cleaning, leave the grinder with a small fill and keep the cap loosely rested rather than fully sealed to allow airflow and reduce moisture accumulation.
When choosing salts, coarser crystals like Himalayan pink or fleur de sel flow more freely through the mechanism and cause less clumping than finely ground salt. This is also one of the reasons investing in quality wooden kitchen tools pays off — well-made salt mills have better burr clearances that resist bridging even with finer salts.
Wooden Spice Grinders
Spice grinders are the most demanding to clean because whole spices carry volatile aromatic oils that bond to wood grain readily. Clean between each spice change and at least once a month during regular use. The rice-and-baking-soda two-stage approach is your standard deep clean protocol. For particularly resinous spices like star anise, allspice, or dried chili, inspect the burr teeth after each use and clear any visible oil residue with a dry stiff brush before it has a chance to harden.
Conditioning and Protecting the Wood
Cleaning removes residue and odor — conditioning protects the wood body itself. Wooden grinders benefit from periodic oiling just as cutting boards and wooden utensils do. The right product for this task is food-grade mineral oil, a colorless, odorless, tasteless oil that is fully inert once applied and does not go rancid. Unlike vegetable or olive oils, which oxidize and smell sour over time, food-grade mineral oil is the gold standard for all food-contact wooden surfaces.
The FDA classifies food-grade mineral oil as Generally Recognized as Safe (GRAS) for food contact applications, and 21 CFR 172.878 specifically permits it as a release agent and lubricant for food processing equipment. The same grade is safe for your wooden grinder, your cutting boards, and your wooden serving tools. If you have a bottle of food grade mineral oil under $10 already in the kitchen, it does double duty across all your wood care needs.
How to Oil a Wooden Grinder
Apply a thin coat of food-grade mineral oil to a soft cloth and wipe down the exterior wooden surfaces of the grinder body. Work with the grain, coating the entire surface including the top cap and base. You do not need to saturate the wood — a thin even film is enough. Allow the oil to soak in for 15 to 20 minutes, then buff away any excess with a clean dry cloth. The wood should look slightly richer in color and feel smooth rather than slick.
Avoid applying oil to the interior chamber or burr mechanism. The interior does not need conditioning — it only needs to stay dry and clean. Oil inside the chamber would coat incoming spice and alter the flavor. Keep the oil treatment strictly to the exterior wooden body. A small bottle of food-grade mineral oil is inexpensive and goes a long way — a single application takes just a few drops. The USDA Forest Products Laboratory recommends periodic oiling for any unfinished or lightly finished wood exposed to kitchen moisture cycles.
How Often to Condition
For a grinder that lives on the countertop and sees daily use, a mineral oil treatment every two to three months is appropriate. Grinders stored in a cabinet away from cooking heat and steam can go longer between oilings — once or twice a year. You will know it is time to condition when the wood starts to look dull, dry, or slightly grey at the ends. The same frequency guidance applies to caring for maple wood cutting boards — wood tells you when it is thirsty if you know what to look for.
Recommended Grinders and Supplies
If you are ready to upgrade your current grinder or stock up on the supplies you need for proper maintenance, here are a few worth having on hand.
Wooden Pepper Grinders
Wooden Pepper Grinders Under $10
A quality wooden pepper grinder under $10 is easy to find and makes a solid everyday mill for black pepper, white pepper, or mixed peppercorns. Look for models with an adjustable ceramic burr for the best grind consistency over time.
Food Grade Mineral Oil
Food Grade Mineral Oil Under $10
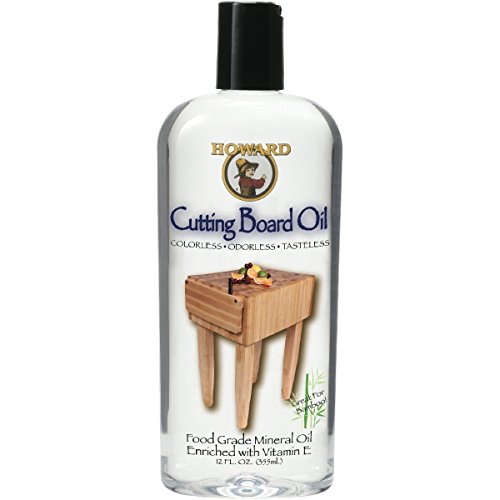


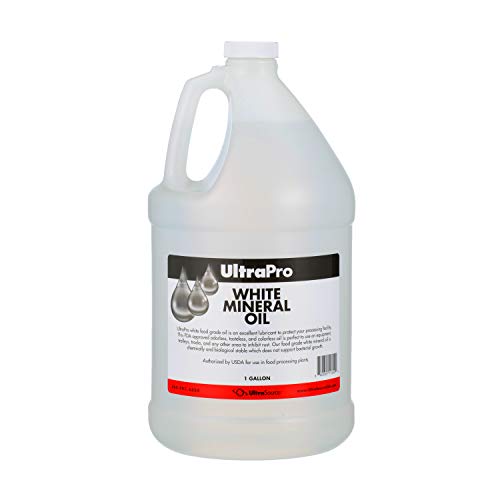

Pick up a bottle of food grade mineral oil and it will serve your grinders, cutting boards, wooden utensils, and butcher blocks for months. A single bottle under $10 is enough for dozens of applications across your whole kitchen wood collection. For advice on wood finishing products more broadly, check out our comparison of polish, oil, or wax for wood finishing.
Keep Your Grinder Clean for the Long Haul
A wooden grinder that gets regular dry cleaning and occasional conditioning can last decades. The biggest risk is not daily use — it is neglect. Salt left sitting in a humid grinder for months, resinous spice oils that oxidize and harden inside the chamber, and a wood body that has never seen a drop of mineral oil are a recipe for a tool that seizes, smells, and eventually splinters.
The routine does not have to be complicated. Once a month, empty the grinder, give the burr a brush pass, wipe down the exterior, and let it air. Every few months, do the full disassembly and deep clean described above. Every two to three months, apply a thin coat of food-grade mineral oil to the wood body. That is genuinely it. The total time investment across a year is probably under an hour — and the return is a grinder that keeps delivering consistent, flavorful grinds without any drama.
If you have other wooden kitchen tools that could use the same level of care, our guide on how to sanitize a wooden cutting board covers the full approach for surfaces that see even more food contact than your grinder does. The underlying philosophy is the same: dry first, minimal moisture, food-safe oil as the finishing step. Treat wood with respect and it will reward you with a lifetime of use.
Pro tip: Store your wooden grinder away from the stovetop. The heat and steam from cooking cycles are far more damaging to the wood finish than normal kitchen air exposure. A spot on the counter two feet from the range is fine — right above the burner is not.
This article contains affiliate links #ad
How often should you clean a wooden grinder?
For daily-use wooden pepper grinders, a light dry-brush cleaning once a month is sufficient. Wooden salt grinders need cleaning every two to three weeks in humid climates because salt absorbs moisture and can clump inside the mechanism. Wooden spice grinders should be cleaned between spice changes and at least monthly during regular use. Deep cleaning with full disassembly should happen every two to three months regardless of grinder type.
Can you wash a wooden pepper grinder with water?
No. You should not wash a wooden pepper grinder with water or submerge it in any liquid. Water causes the wood to swell, which can bind the grinding mechanism, loosen glue joints, and promote mold or mildew inside the chamber. The correct method is dry cleaning with a stiff brush, compressed air for stubborn burr residue, and a barely damp cloth for exterior sticky spots — followed immediately by thorough drying.
How do you disassemble a wooden pepper mill for cleaning?
Most wooden pepper mills disassemble by unscrewing the top knob or acorn nut at the grinding end. Once the nut is removed, the internal shaft mechanism slides straight out of the wooden body. Some models have a twist-off base instead. Always check whether your grinder has a locking collar or secondary securing screw before attempting to pull the shaft. Keep all parts organized on a clean cloth in disassembly order so reassembly is straightforward.
What oil should you use to condition a wooden grinder?
Food-grade mineral oil is the best choice for conditioning a wooden grinder. It is colorless, odorless, tasteless, and does not go rancid like vegetable or olive oils do. Apply a thin coat to the exterior wooden body only — not inside the chamber or on the burr mechanism — and buff away excess after 15 to 20 minutes. The FDA classifies food-grade mineral oil as GRAS (Generally Recognized as Safe) for food contact applications.
How do you get rid of smell in a wooden spice grinder?
The most effective approach for odor removal in a wooden spice grinder is a two-stage treatment. First, grind a small amount of dry white rice through the mechanism — the rice acts as a mild abrasive that scrubs residual aromatic oils from the burr while absorbing odor compounds. Second, fill the empty chamber loosely with dry baking soda, cap it, and leave overnight. Tap out the baking soda the next morning, brush the interior clean, and allow several hours of airflow before refilling with fresh spice.

Wooden Kitchen Spoons: Complete Cleaning And Caring Guide

How to Clean a Wooden Chopping Board the Right Way

How to Clean a Wooden Cutting Board After Raw Meat

Do chefs use wooden utensils? 4 surprising reasons they do

How to Season a New Wooden Cutting Board (First-Time Guide)

How to oil a wooden cutting board: Step-by-step guide
Loved by our customers


Wooden Utensil Holder


Wood Cutting Boards
Walnut Wooden French Bread Slicer for Baguettes, 1 inch thick slices

Living Room