







How to Season a New Wooden Cutting Board (First-Time Guide)

You just unboxed a beautiful new wooden cutting board. It feels solid, smells like fresh timber, and you’re already picturing it loaded with vegetables and snacks for a football afternoon on a Sunday. But before you make your first cut, there’s one important step most people skip: seasoning.
Seasoning a new wooden cutting board protects the wood from moisture, prevents cracking, and keeps bacteria from finding a home in the grain. Skip it, and that gorgeous board can warp within weeks. Do it right, and you’re looking at a kitchen tool that outlasts every trendy gadget in your drawer and in your kitchen including your air fryer.
The good news? Seasoning a cutting board is easy. It takes about 30 minutes of hands-on time spread across a few days, and the supplies cost less than a fancy bottle of olive oil. This guide walks you through every step, including which oils are safe (and which ones will ruin your board).
In this guide: You’ll learn exactly how to season a new wooden cutting board from scratch, which food-safe oils to use, how many coats to apply, and how to maintain it long-term so it stays beautiful for years.
Table of Contents
Why You Need to Know How to Season a New Wooden Cutting Board
Wood is a living material, even after it’s been milled and shaped into your new cutting board. It naturally absorbs and releases moisture depending on what’s going on in your kitchen. Without a protective oil coating, that cycle of wet and dry causes the wood fibers to swell, shrink, and eventually crack or warp.
Seasoning fills those wood fibers with food-safe oil, creating a moisture barrier that keeps the board stable. It also seals the surface so bacteria have fewer places to hide between uses. Research from the UC Davis Food Safety Lab showed that wood has natural antibacterial properties, and a well-oiled board makes it even harder for bacteria to survive in the grain (sad news for them).
Think of it like conditioning leather boots before wearing them outside. You wouldn’t expect them to last in the rain unsealed. Same idea here, except your “boots” are going to meet raw chicken and citrus juice.
Quick tip: New boards need more oil than used ones because the wood is completely dry from manufacturing and storage. Plan to apply 3 to 5 coats before your first real use.
What Oil to Use on a Wooden Cutting Board
This is where a lot of new cutting board owners make an expensive mistake. Not all oils are created equal, and some popular kitchen oils will turn your beautiful board rancid within days.
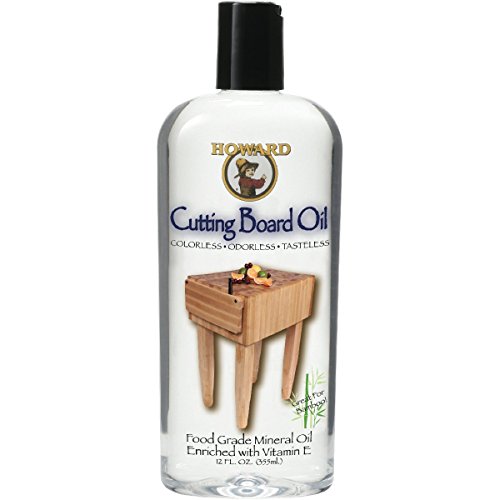
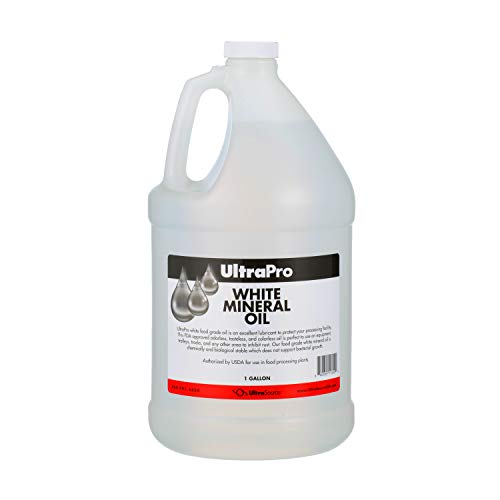
Food-grade mineral oil is the gold standard for cutting board seasoning. It’s odorless, flavorless, non-toxic, and it never goes rancid. The FDA classifies food-grade mineral oil as Generally Recognized as Safe (GRAS) for use on food-contact surfaces, which makes it the obvious choice for a kitchen tool that handles your meals every day.
Beeswax and carnauba wax conditioners are excellent as a second layer after oiling. They add extra protection and give the board a smooth, slightly polished feel. Many products combine mineral oil and beeswax in one formula, which works great for new boards.
Avoid these oils entirely:
- Olive oil — goes rancid quickly and will make your board smell sour
- Vegetable oil — same problem; oxidizes fast and turns sticky
- Canola oil — another cooking oil that breaks down and spoils
- Coconut oil — slightly better than others but still goes rancid over time, especially in warm kitchens
The rule of thumb: if it belongs in your pantry for cooking, keep it away from your cutting board. Stick to mineral oil or a dedicated cutting board conditioner under $15 like these ones from Amazon, per 21 CFR 172.878, which confirms food-grade white mineral oil is approved for food-contact use.
Want to see your seasoning-supply options? Check out our post on cutting board maintenance for a full rundown of conditioners, oils, and when to use each.
Pro tip: Warm the mineral oil slightly before applying it. A few seconds in a bowl of hot water (not the microwave, just warm water) makes it thinner and easier to work into the wood grain.
How to Season a New Wooden Cutting Board: Step by Step
Here’s the full process for how to season a new wooden cutting board. You’ll need food-grade mineral oil, a clean lint-free cloth or paper towels, and a little patience. The entire process takes 2 to 3 days because each coat needs time to absorb fully.
Step 1: Clean and Dry the Board
Wipe the board down with a slightly damp cloth to remove any dust or debris from shipping. Dry it completely with a towel, then let it air-dry for at least 30 minutes. The board must be bone dry before you apply any oil. Oiling a damp board seals moisture inside the wood, which causes more problems than it solves.
Step 2: Apply the First Coat of Oil
Pour a generous amount of food-grade mineral oil onto the board. Use a clean cloth or folded paper towel to rub it in with the grain, covering the entire surface, edges, and the underside. Don’t be shy here. You want the wood thirsty on the first coat.
Give it 6 to 8 hours to absorb, or leave it overnight. When you come back, the board should have soaked up most of the oil. If there are shiny puddles sitting on the surface, wipe them off. Pooled oil doesn’t help the wood; it just gets sticky.
Step 3: Repeat for 3 to 5 Coats
New boards need multiple coats because the dry wood keeps drinking the oil. Apply the second coat the same way, wait 6 to 8 hours, wipe off any excess. Repeat until the board stops absorbing oil quickly. Usually, this takes 3 to 5 coats over 2 to 3 days.
You’ll know you’re done when you apply oil and it sits on the surface for a while before absorbing. That means the wood is saturated and protected. Some dense woods like maple and walnut may take fewer coats; softer woods like pine need more.
Step 4: Optional Wax Finish
After the final coat of oil has fully absorbed (give it a full 24 hours), you can apply a cutting board conditioner wax under $15. Apply a thin layer with your finger or a cloth, let it sit for 15 minutes, then buff with a clean cloth. Wax adds a water-repellent layer that makes cleanup easier and gives the board a lovely satin sheen.
For tips on cleaning your board after use, read our guide to how to sanitize a wooden cutting board properly without damaging the finish.
How Many Coats Does a New Board Need?
For a brand-new wooden cutting board, plan on applying 3 to 5 coats before your first use. This initial seasoning is the most important treatment the board will ever receive. Think of it like priming a wall before painting: the more prep work you put in upfront, the better everything holds together afterward.
After the initial seasoning, you’ll only need to re-oil the board once a month during regular use, or whenever the wood looks dry and pale. You can also use the water-drop test: sprinkle a few drops of water on the surface. If the water beads up, your seasoning is holding. If it soaks in immediately, it’s time to reapply.
Different board types have slightly different needs:
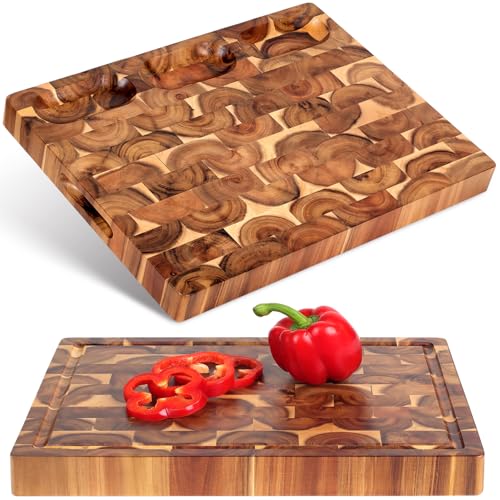
- End grain cutting boards – absorb oil faster because you’re oiling the cross-section of the wood fibers. Plan for an extra coat or two on initial seasoning.
End grain cutting boards worth seasoning



THETCHRY Maple End Grain Cutting Board Set, Wood Cutting Boards…
$139.99
Only 5 left in stock - order soon.
Buy on Amazon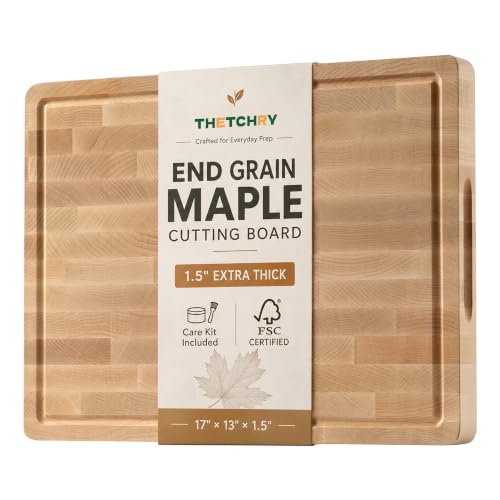
- Edge grain cutting boards – slightly more resistant to moisture absorption, but still need the same 3-5 coat treatment to start.
Edge grain cutting boards worth seasoning


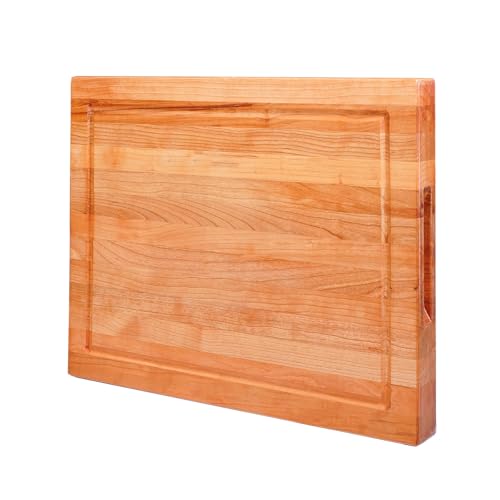
CONSDAN Solid Cherry Wood Cutting Board for Kitchen, USA Grown…
$45.99
Only 19 left in stock - order soon.
Buy on Amazon
CONSDAN Solid Cherry Wood Cutting Board for Kitchen, USA Grown…
$59.99
Only 1 left in stock - order soon.
Buy on Amazon- Face grain boards – the smoothest surface type; absorbs oil more slowly, so slightly fewer coats may be needed.
Common Mistakes to Avoid
Even with straightforward instructions, there are a few slip-ups that catch first-timers off guard. Here’s what to watch out for.
- Using cooking oils. We covered this above, but it bears repeating: olive oil, vegetable oil, and coconut oil go rancid on wood. The smell is unpleasant and it can affect how your food tastes.
- Oiling only one side. Always oil both sides and the edges. Oiling just the top creates uneven moisture content in the board, which causes warping. The board literally bends toward the dry side.
- Applying too much oil at once. Thick pools of oil sitting on the surface don’t absorb any faster. They just get sticky. Use a moderate amount and let each coat absorb before adding the next.
- Not drying the board first. Oiling a wet board traps moisture inside. Always let your board dry completely before applying oil.
- Putting it in the dishwasher. Dishwasher heat and prolonged water exposure will warp and crack any wooden cutting board, seasoned or not. Hand wash only, and dry immediately.
Warning: Never soak a wooden cutting board in water, submerge it in a sink, or leave it sitting in liquid. Even a well-seasoned board will crack if left wet for extended periods. Quick rinse, towel dry, done.
Curious how wood handles heat and moisture in the kitchen? Check out are wood cutting boards heat resistant for the full breakdown.
How to Keep Your Board Seasoned Long-Term
After the initial 3 to 5 coat treatment, maintenance is simple. Most boards only need re-oiling once a month with regular use. Here’s a simple routine that keeps your board in great shape:
- After every use: Rinse with warm water and mild dish soap. Wipe dry with a towel immediately. Stand the board upright (or prop it) to allow airflow on both sides while it finishes drying.
- Weekly: Do the water-drop test. If water beads up, you’re good. If it soaks in, apply a thin coat of mineral oil.
- Monthly: Give the board a full re-oiling treatment (one coat on all surfaces) and optionally a beeswax conditioner after.
- As needed: If the board looks pale, feels rough, or starts smelling off, that’s your cue to oil it. Don’t wait for obvious dryness.
For a complete care system that covers cleaning, sanitizing, and long-term storage, read our in-depth post on how to care for a maple wood cutting board. The principles apply to most hardwood boards, not just maple.
Also worth bookmarking: our wooden vs. plastic cutting boards comparison if you’re still deciding whether wood was the right call (spoiler: it was).
Shop Food-Safe Cutting Board Oils and Conditioners
Food-Grade Mineral Oil
Top-Rated Mineral Oils for Cutting Boards



Cutting Board Conditioners and Wax Finishes
Oil and Wax Conditioners for Wood Boards


Upgrade Your Board Collection
Not sure your current board is worth the effort? Browse wooden cutting boards under $30 and find one worth seasoning.
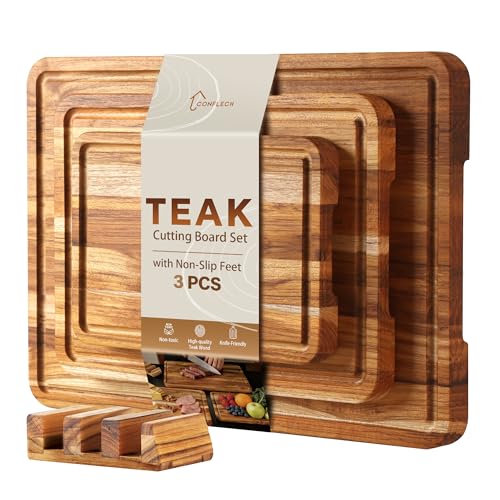
Beautiful Wooden Cutting Boards Worth Seasoning




Ready to Put Your Board to Work
Seasoning a new wooden cutting board is one of those small investments of time that pays off for years. A few minutes of oiling now means a board that stays flat, resists bacteria, and looks great on your counter for a long time.
To recap: clean and dry the board first, apply food-grade mineral oil to all surfaces, repeat for 3 to 5 coats over a couple of days, then follow up with a monthly maintenance oil. Avoid cooking oils. Never soak it. And if you want an extra layer of protection, finish with a beeswax conditioner after the final coat.
Once you’ve got seasoning down, the next step is knowing how to choose the right board for your kitchen. Our guide to choosing the best wood cutting board will walk you through wood species, grain types, and what size actually makes sense for your prep style. And if you’re weighing species-specific options, the acacia vs. teak cutting board comparison is worth a read before you buy.
Frequently Asked Questions
How many times should I season a new wooden cutting board?
For a brand-new board, apply 3 to 5 coats of food-grade mineral oil before your first use. After that, one coat per month is enough for regular maintenance. On each round, let the oil absorb for 6 to 8 hours before wiping off any excess and applying the next coat.
What is the best oil for seasoning a wooden cutting board?
Food-grade mineral oil is the best choice for cutting board seasoning. It is odorless, tasteless, non-toxic, and never goes rancid. The FDA approves it for use on food-contact surfaces. Beeswax conditioners work well as a finishing layer on top of mineral oil. Avoid cooking oils like olive oil, vegetable oil, or coconut oil since they go rancid on wood.
Should I season both sides of my cutting board?
Yes, always oil all surfaces including the underside, sides, and edges. Oiling only the top creates uneven moisture levels inside the wood, which causes the board to warp toward the dry side. Think of the board as needing balanced protection on every face.
Can I use the cutting board right after seasoning?
Wait at least 24 hours after your final coat before using the board for food prep. This gives the oil time to fully cure into the wood rather than sitting on the surface. If you applied a beeswax finish, buff it out after 15 minutes, then let the board rest overnight before its first real use.
Will my wooden cutting board warp if I skip seasoning?
It can, yes. Unsealed wood absorbs moisture unevenly from washing and food prep, which causes the fibers to swell and contract at different rates. Over time, this leads to warping or cracking, especially in boards exposed to water regularly. Seasoning creates a moisture barrier that keeps the board stable through repeated use and washing.
This article contains affiliate links #ad


Loved by our customers


Wooden Utensil Holder

Wood Cutting Boards
Walnut Wooden French Bread Slicer for Baguettes, 1 inch thick slices
Living Room