






How to Get Rid of Mold on a Wooden Cutting Board
You pulled your wooden cutting board out of the cabinet and spotted something dark and fuzzy growing in the grooves. Your stomach sank. Before you panic and throw it in the trash, take a breath. Surface mold on a wooden cutting board is more common than you think, and in most cases, it’s fully salvageable.
The key is knowing the difference between mold that’s sitting on the surface and mold that’s worked its way into the wood fibers. One cleans up with pantry staples you already own. The other is a genuine reason to replace the board. This guide walks you through both scenarios so you can make the right call without guessing.
Important: Mold on a cutting board does not automatically mean the board is unsafe to keep. Surface mold caused by moisture and poor storage is common and treatable. Deep black mold that has penetrated the wood grain is a different story. Read through this guide before deciding to discard and learn how to get rid of mold on a wooden cutting board.
Table of Contents
Why Wooden Cutting Boards Get Moldy
Wood is porous. That’s actually one of its strengths as a cutting board material — studies have shown that bacteria drawn into the wood grain tend to die off naturally, as documented in UC Davis food safety research. But that same porosity creates ideal conditions for mold when you add moisture, food residue, and limited airflow into the mix.
The most common culprits are straightforward: leaving a damp board flat on the counter, storing it in a dark cabinet before it fully dries, or washing it and stacking it against other dishes. Mold spores are literally everywhere in your kitchen. Give them moisture and organic material to feed on, and they will take full advantage. The good news is that most of the mold you find on a wooden cutting board is a surface-level problem, not a structural one.
Boards that haven’t been oiled regularly are especially vulnerable. Without a barrier of food-grade mineral oil protecting the grain, moisture penetrates deeper and faster. That’s why a consistent care routine for your wood cutting board is the best mold prevention strategy you have.
Surface Mold vs. Deep Mold: How to Tell the Difference
Not all mold is equal. Before you break out the cleaning supplies, do a quick assessment to figure out what you are dealing with. The diagnosis changes everything about your next steps.
Surface mold is your best-case scenario. It typically looks fuzzy or powdery, sits on top of the wood, and appears in patches rather than deep stains. Colors range from white to gray to green. If you scratch at it lightly with a fingernail and it comes off cleanly without leaving a dark stain in the wood, that is surface mold. It likely developed because the board stayed damp for a few days, often from being stored face-down or too quickly after washing.
Deep mold is a different problem. It penetrates the wood fiber and shows up as dark gray or black discoloration that doesn’t scrape away. The stain is actually inside the wood, not sitting on top of it. Deep mold can also cause a persistent musty smell that survives scrubbing. If your board looks visibly warped, has black streaks running along the grain, or smells like a wet basement after cleaning, you are probably dealing with deep mold contamination. That board needs to go.
Quick test: Wet the discolored area and let it dry completely. If the dark spots shrink or disappear as it dries, that is likely surface residue. If the stain remains or darkens further, it is embedded in the wood grain. Deep mold that has penetrated the wood cannot be fully removed through surface cleaning.
How to Remove Mold From a Wooden Cutting Board
If you have confirmed surface mold, you are in good shape. The goal here is to kill the mold, remove the spores, and then treat the board so mold has a harder time coming back. You do not need harsh chemicals. The most effective mold treatments for wooden cutting boards use ingredients that are already in your kitchen.
Before you start, take the board outside or work near an open window. Scrubbing mold releases spores into the air, and you do not want to breathe those in or spread them to other surfaces in your kitchen. A pair of kitchen gloves is also a good call. Think of it like handling any other cleaning task: a bit of basic hygiene protection goes a long way.
You will also want to sanitize the board thoroughly after removing the mold, not just clean it. There is a difference between removing visible mold and killing residual spores on the surface. The steps below cover both.
Step-by-Step: Vinegar, Salt, Lemon, and Hydrogen Peroxide
Use these methods in sequence for best results. Start with the physical scrub, follow with a vinegar soak, and finish with hydrogen peroxide to kill any remaining spores. If the mold is mild, you may not need every step.
Step 1: Salt and Lemon Scrub
Sprinkle a generous layer of coarse salt over the entire surface of the board. Cut a lemon in half and use it as your scrubber, pressing firmly and working the salt into the grain in circular motions. The salt acts as a gentle abrasive to lift mold off the surface, while the lemon juice adds mild acidity that disrupts mold cell walls. Let the salt and lemon mixture sit for five to ten minutes, then rinse thoroughly with warm water and pat dry immediately.
Step 2: White Vinegar Treatment
Undiluted white vinegar is one of the most effective natural mold treatments for wood surfaces. Pour a thin layer of white vinegar directly onto the board and spread it evenly with a cloth or sponge. Let it sit for at least five minutes — longer if the mold growth was significant. The acetic acid in vinegar kills up to 82% of mold species, according to USDA food safety guidelines recommending acidic cleaners for cutting board maintenance.
If you have concerns about vinegar’s effect on your board’s finish, know that brief exposure is safe. Prolonged soaking or daily use of vinegar is where problems arise. Our full breakdown on whether vinegar is safe for wood surfaces covers the details. For mold removal, a short treatment is both effective and safe.
Step 3: Hydrogen Peroxide Sanitize
After rinsing off the vinegar, apply 3% hydrogen peroxide (the standard drugstore variety) to the board and let it bubble for a few minutes. Hydrogen peroxide is an oxidizer that kills mold spores, bacteria, and viruses without leaving harmful residues on a food contact surface. The FDA classifies hydrogen peroxide as acceptable for use on food-contact surfaces at appropriate concentrations. Rinse thoroughly after treatment and dry the board standing upright.
Do not use bleach on wooden cutting boards. While bleach kills mold effectively on non-porous surfaces, it can damage wood fibers, cause discoloration, and is harder to rinse completely from porous materials. Stick to vinegar and hydrogen peroxide for wood. Your board will thank you.
Step 4: Sand If Needed
If light surface staining remains after the cleaning steps above, a light sanding can restore the board. Use 120-grit sandpaper to sand with the grain, then follow with 220-grit sandpaper for a smooth finish. Sand the entire cutting surface evenly, not just the stained area. After sanding, wipe away all dust and re-oil the board immediately. Sanding removes the protective oil layer along with the stain, so skipping the re-oiling step will leave your board unprotected and more vulnerable to future mold growth.
When to Throw the Board Away
Some boards simply cannot be saved. Knowing when to let go is just as important as knowing how to clean. Here are the signs that replacement is the right call.
Replace your wooden cutting board if you see any of the following: black or dark gray staining that penetrates the grain and doesn’t budge after cleaning, a persistent musty or mildewy smell that returns within a day or two of washing, visible warping or deep cracking that creates grooves where bacteria and mold spores collect, or mold that keeps coming back in the same spot within days of cleaning. Repeat mold is a sign of deep spore colonization that surface cleaning cannot address.
Also consider the age and condition of the board overall. A cutting board that is heavily scored with deep knife cuts is harder to clean thoroughly and more prone to harboring both bacteria and mold spores. The physical condition of a wooden board affects how well it can be maintained. If the board is old, heavily grooved, and has now developed persistent mold, a replacement is the most practical and food-safe choice.
Time to toss it? If mold returns within 48 hours of a full cleaning treatment, or if the staining is black and deep in the grain, the board has reached the end of its safe life. No amount of scrubbing will fix a board that is moldy from the inside. Food safety always wins.
When It Is Time for a New Board
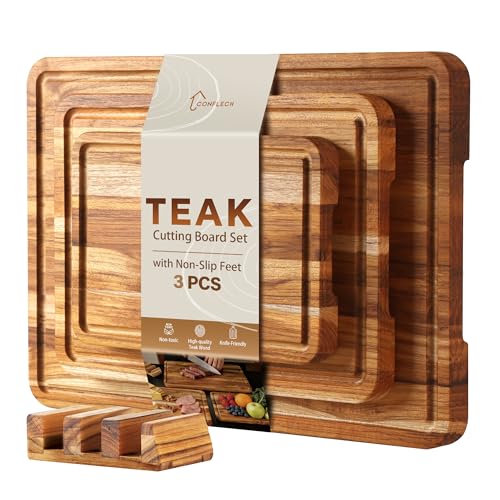
If your board has crossed into replacement territory, the silver lining is that you get to start fresh with a better one. Replacing a mold-compromised board is genuinely the safest and most practical path forward. You can find solid options for wooden cutting boards under $20 that are worth every penny when you factor in what you are getting rid of.
Top-Rated Wooden Cutting Boards
Shop Wooden Cutting Boards


How to Prevent Mold on Wooden Cutting Boards
Once your board is clean (or you have a new one in hand), prevention is the name of the game. Most mold problems on wooden cutting boards come down to three things: moisture, storage, and lack of oil. Fix those three and mold rarely becomes an issue.
Dry It Standing Up
This single habit change prevents more mold than anything else. Never lay a wet cutting board flat on the counter or in a cabinet. Always stand it upright so air can circulate around both sides. The underside of a flat board traps moisture against the counter and creates exactly the damp, dark, poorly ventilated conditions that mold loves. A dish rack works perfectly for drying, or lean it against the backsplash at an angle.
Oil Regularly with Food-Grade Mineral Oil
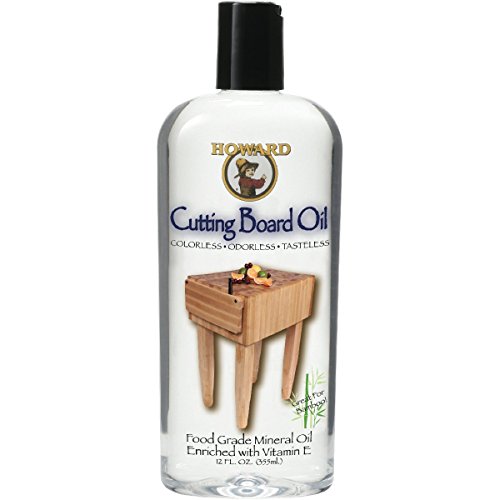
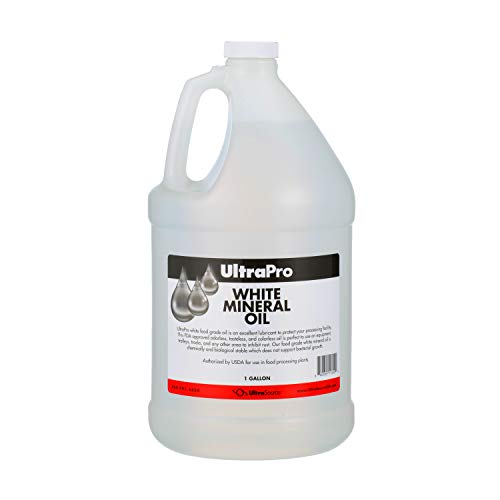
A well-oiled board repels moisture rather than absorbing it. Food-grade mineral oil is the gold standard because it doesn’t go rancid, won’t affect the flavor of your food, and creates a genuine barrier against moisture penetration. For a new board, apply three to five coats over the first week. After that, a monthly oiling is enough to keep the board protected. You can find end grain cutting board oil under $10 that does the job effectively.
Recommended Cutting Board Oils
Food-Grade Oils to Protect Your Board



Wash With Warm Soapy Water Only
Avoid the dishwasher entirely. The combination of high heat, prolonged soaking, and forceful water jets will warp, crack, and strip the protective oil from your board faster than you can say “mold problem.” Wash by hand with warm soapy water, scrub briefly, rinse thoroughly, and dry immediately. Do not let it soak in the sink. Even five minutes submerged is longer than a wooden board should spend in standing water.
Store in a Dry, Well-Ventilated Spot
Dark, enclosed cabinets with little airflow are mold incubators for any kitchen item that retains moisture. Store your cutting board in a spot where air moves around it — either standing upright in a dedicated slot or propped at an angle. If you store it flat in a cabinet, at least make sure it is bone dry first and has some space around it. Cleaning and caring for your wooden cutting board properly includes thinking about storage, not just washing.
The Mold-Free Kitchen
Finding mold on your cutting board is alarming, but it doesn’t have to mean the end of the board or a food safety crisis. Surface mold responds well to a salt and lemon scrub, a vinegar treatment, and a hydrogen peroxide sanitize. Deep mold is a different animal and calls for a replacement. Knowing which one you have is the most important step in the process.
Going forward, three habits keep mold away for good: dry the board standing upright after every wash, oil it monthly with food-grade mineral oil, and never store it damp. Those three things together are more powerful than any cleaning product on the market. A board that stays dry and well-oiled simply doesn’t give mold the conditions it needs to take hold.
If you want to take your board care knowledge further, our guide on how to sanitize a wooden cutting board covers the full routine for keeping bacteria in check day to day, not just in mold emergencies. And if you are curious about heat as a sanitizing option, we break down exactly how heat-resistant wooden cutting boards really are and where that approach falls short.
This article contains affiliate links #ad
Is it safe to use a wooden cutting board that had mold on it?
Yes, if the mold was surface-level and you cleaned it thoroughly using the salt-lemon scrub, vinegar treatment, and hydrogen peroxide sanitize method described above. Surface mold that has been fully removed and the board re-oiled is safe to use. However, if the mold was deep in the grain, caused black staining that persisted after cleaning, or if the smell returns within 48 hours, discard the board immediately.
Does vinegar kill mold on wooden cutting boards?
Yes. Undiluted white vinegar kills up to 82% of common mold species and is safe for use on wooden cutting boards in short treatments. Apply it directly, let it sit for at least five minutes, then rinse thoroughly. Vinegar is one of the most effective natural treatments for surface mold on wood. Do not use it as a daily cleaner, since repeated acidic exposure can dry out the wood over time.
How do you know when a moldy wooden cutting board should be thrown away?
Replace the board if you see black or dark gray staining that penetrates deep into the grain and doesn’t respond to cleaning, if a musty smell returns within 48 hours of treatment, if the board is visibly warped or deeply grooved, or if mold keeps returning in the same area after repeated cleanings. These signs indicate that mold spores have colonized the wood at a level that surface cleaning cannot address.
Can hydrogen peroxide be used on wooden cutting boards?
Yes. Standard 3% hydrogen peroxide (the same kind sold in pharmacies) is safe for use on wooden cutting boards as a sanitizing agent. It kills mold spores, bacteria, and viruses on contact without leaving harmful residues. Apply it after the vinegar step, let it bubble for a few minutes, then rinse thoroughly. The FDA classifies hydrogen peroxide as acceptable for food-contact surface sanitizing at appropriate concentrations.
How do you prevent mold from coming back on a wooden cutting board?
Three habits prevent most mold problems: always stand the board upright to dry after washing so air circulates on both sides, oil the board monthly with food-grade mineral oil to create a moisture barrier, and never store the board while it is still damp. Avoid the dishwasher and never let the board soak in water. A well-maintained, regularly oiled board rarely develops mold problems.

Outdoor Furniture Covered In Mold Here’s The Quick Fix You Need
How to oil a wooden cutting board: Step-by-step guide
How to care for a maple wood cutting board
Learn How to Sanitize a Wooden Cutting Board Correctly
How to Remove Fish Smell from a Wooden Cutting Board
Cutting Board Maintenance: The Complete Guide
Loved by our customers


Wooden Utensil Holder

Wood Cutting Boards
Walnut Wooden French Bread Slicer for Baguettes, 1 inch thick slices
Living Room